How to create a subdomain
How to create a subdomain
Unlocking the Power of Subdomains:
In the ever-expanding realm of the internet, creating a subdomain is a pivotal skill that opens the gateway to enhanced organization, improved user experience, and heightened online presence. Whether you’re a seasoned web developer or a curious enthusiast looking to delve into the intricacies of website management, this guide is your compass to navigate the landscape of subdomains.
In the following exploration, we will unravel the mysteries of subdomains, demystifying the process of their creation and shedding light on the myriad opportunities they present. From the fundamentals to advanced techniques, join us on this journey to master the art of creating subdomains and discover how they can revolutionize your online ventures. Let’s embark on this empowering odyssey and elevate your digital presence to new heights.
- Log in to cPanel:
- Open your web browser and navigate to your cPanel login page. This is usually something like http://yourdomain.com/cpanel .
- Enter Credentials:
- Enter your cPanel username and password to log in.
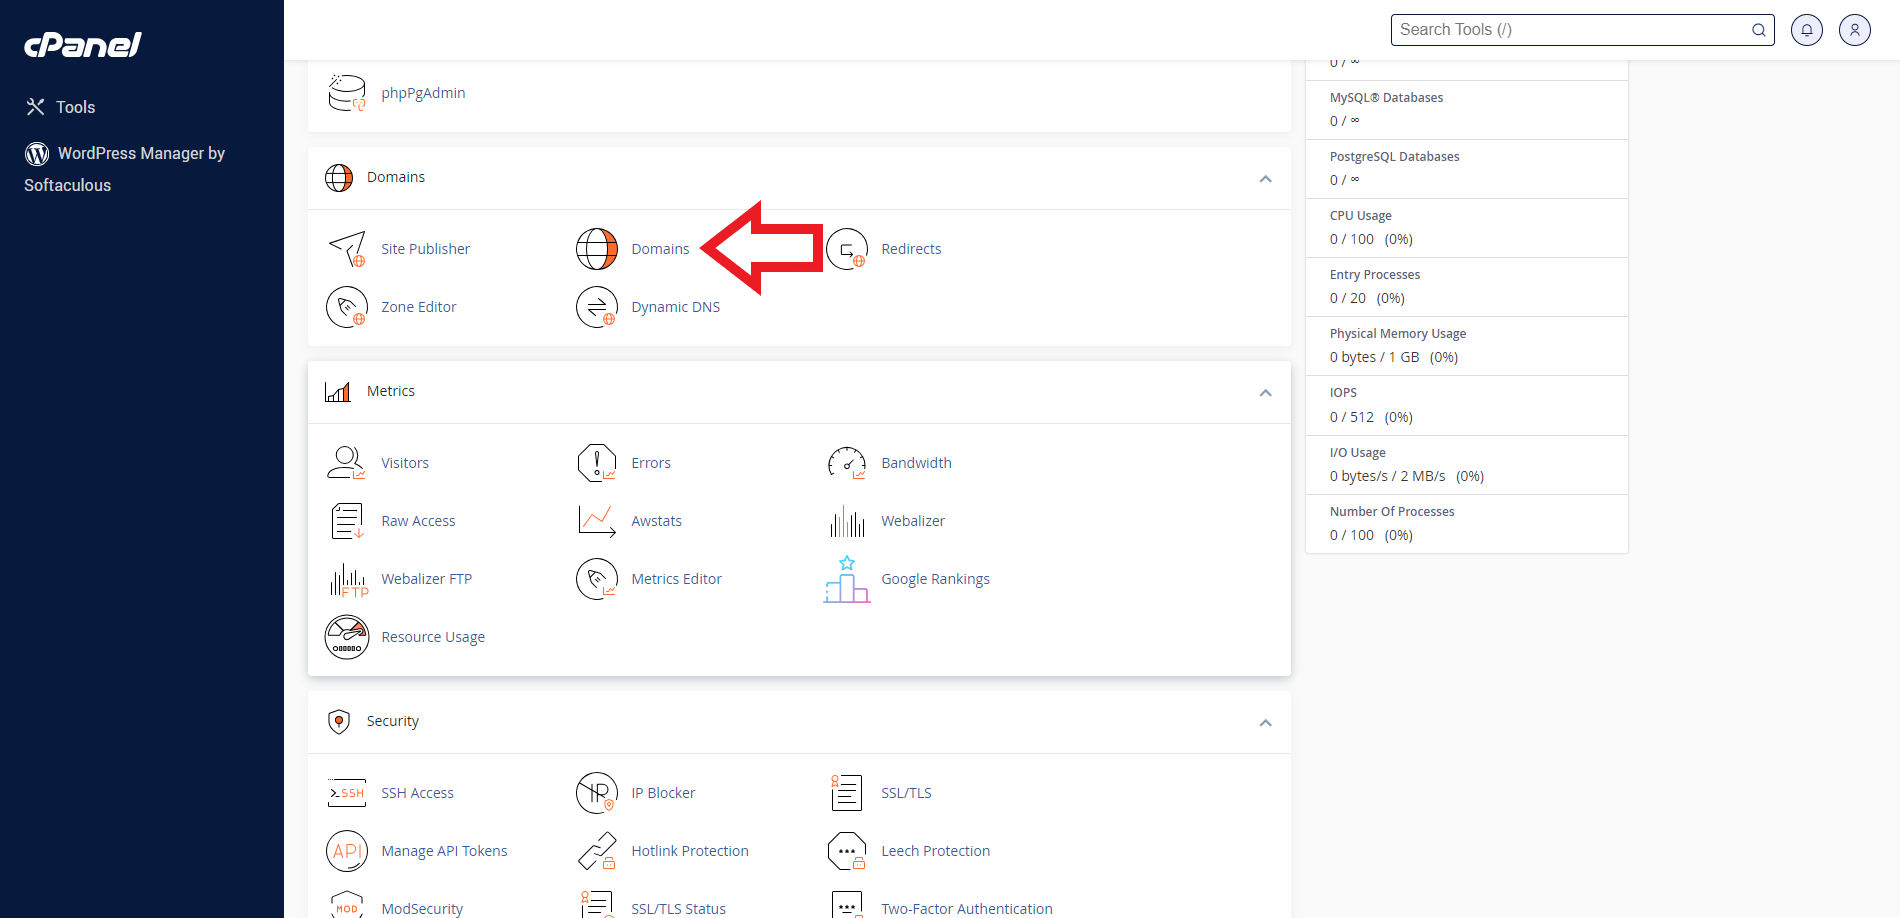
- Locate the “domains” Section:
- Once logged in, look for the “Domains” section.
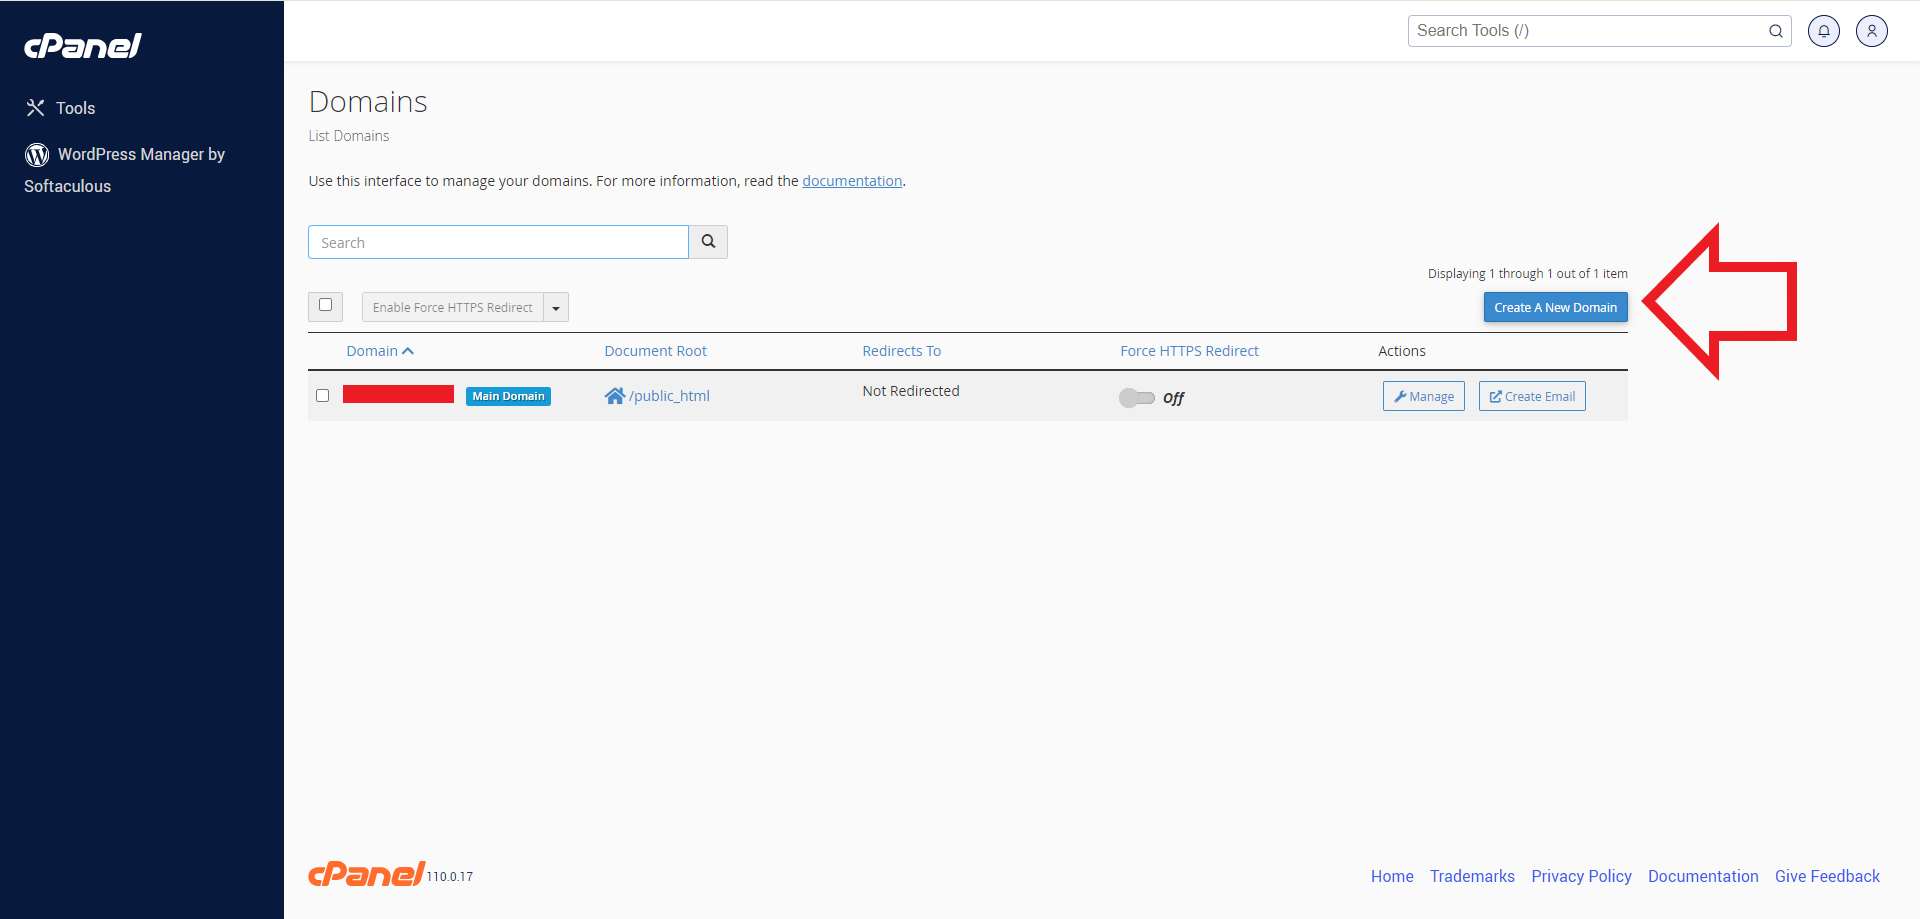
- Create a domain:
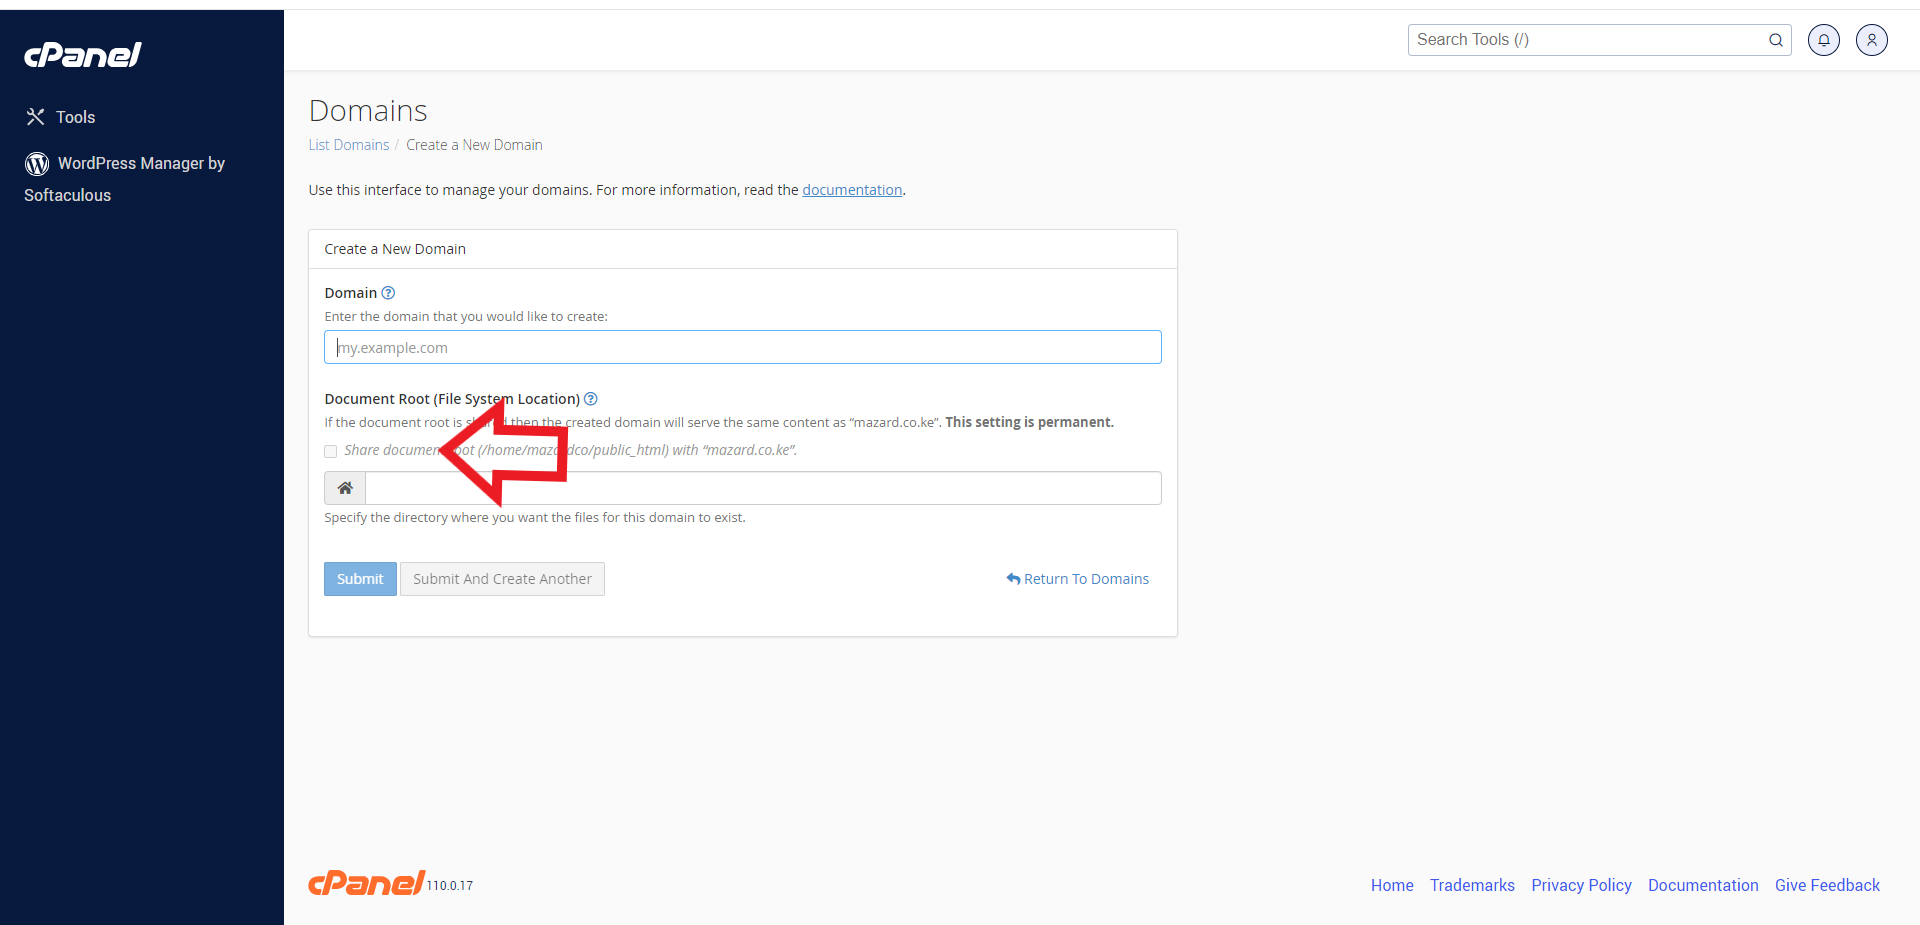
- In the “domains” section, you’ll see a form to create a new domain. Fill in the following details:
- Subdomain: Enter the desired subdomain name (e.g., blog).
- Domain: Choose the main domain for which you want to create the subdomain from the drop-down menu.
- Document Root (Optional):
- The “Document Root” field will be automatically filled based on your subdomain and domain. You can customize this if needed, but in most cases, it’s best to let cPanel handle it.
- Create the Subdomain:
- Click the “Submit” button to finalize the process.
For more updates and insights, follow us on Facebook @webcomcloud.
Unlock your online presence! Register your domain with us today. Secure, reliable, and user-friendly. Choose from a wide range of domains. Your perfect web address is just a click away!


